How to get started with building the perfect garden soil without going to the store
We often talk about building a cubic yard of soil (in fact, we’ve created a full online training program around it).
When we talk about building a cubic yard of soil through strategically composting, we mean that many plants have different nutrients and minerals that we can use to make our compost and our soil supercharged! Some of these plants have Nitrogen, some of them have more potassium or phosphorus or silica…
The idea of strategic composting is pre-planting ahead of time plants that you can use as a composting source, often referred to as green manure. The idea of planting things and targeting different nutrients and minerals that your garden may be deficient in, or you just want more of. A great example of this is that some plants are “mineral miners” that access minerals deep down due to the nature of their root system.
“WE USE ALL OF THESE SPECIAL PLANTS TO STRATEGICALLY CREATE MORE NUTRIENT DENSE COMPOST AND SOIL.”
… moringa is another excellent plant to compost.
To just put composting & soil building into common language… the idea that you can take your newspaper, your cardboard, your bills, your kitchen scraps, a little bit of sand from the beach, wood chips, and a few bugs, and setting up a pile and letting them all go to work on it along with some earthworms and other creatures. You can take all of this and build a cubic yard of soil.
A cubic yards of soil can grow quite a bit of food!
Out of a cubic yard of living soil you’ll be able to make a 6’ x 9’ garden bed that is 6 inches high. You can grow quite a lot of food from this.

LET’S DIFFERENTIATE COMPOST AND SOIL…
Compost is a mix of carbon and organic material where soil is carbon, organic material, and mineral material, as well as oxygen and water.
On a very basic level, compost is made out of mixing nitrogen and carbon. With our strategic composting system that creates fertile compost that’s teeming with life, we have carbon, creatures, and creature food (we go into this in depth later in this article!)
Soil, on the other hand, is made out of 6 ingredients:

We should also mention that our way composting and creating soil is different than how everyone else is doing it…
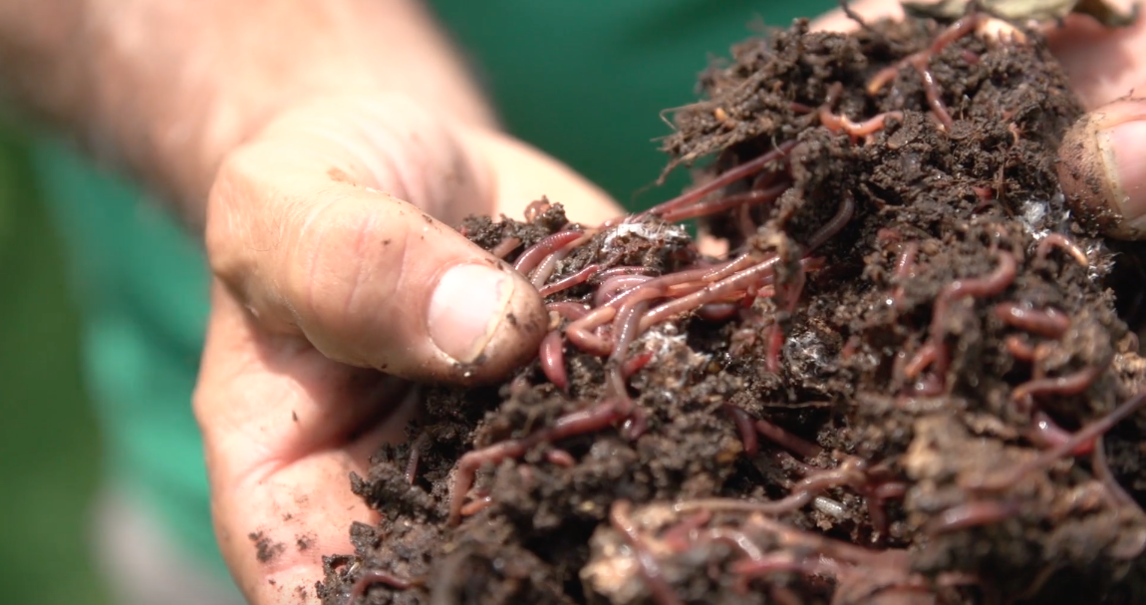
We use a myriad of creatures in our soil building process. Earthworms, amphipods, fungi, woodlice…
We are basically taking our large compost pile and putting the compost and the minerals together, and rather than chemically composting (through the processes typically used in municipal large-scale composting facilities), we allow the creatures that we put together to actually go to town on it – mechanically processing the material.
Over the long-term our compost piles do reach a state of thermophilic chemical composting in certain areas, but there a spaces for the creatures to migrate in and out so that the fertility of the pile is never compromised. This also allows us to process mineral material in the same space as organic material.
The type of composting that you may be used to hearing about is starting a worm bin – putting together Red Wrigglers, food scraps, and paper waste so that the worms eat the organic material and poop out black gold (worm castings).
The system we’re talking about is adding a few levels of complexity which ultimately makes it more like the way that Nature does it.
Our process prioritizes cold composting, allowing a bit of chemical (hot) composting to happen in there with it, to create a whole cubic yard of SOIL, rather than it just being compost. The fertile living topsoil that we create in this process can be used as the entire growing medium in your garden, versus compost which is used more as an additive to your garden.

This composting / soil building system processes minerals right there next to each other. This actually keeps the pile much cooler!
We also use a lot more carbon than nitrogen in the process, but the nitrogen is not burned off into gases as much and remains with a stable organic fertilizer in the form of castings.
THE BASIC PROCESS OF BUILDING FERTILE LIVING SOIL
1. SOFTEN YOUR PAPER MATERIAL
So in the process of taking all of your cardboard, all of your newspaper and paper scraps (that do not contain heavy-duty glazes or chemical inks), taking that and putting it in some moisture and allowing it to soften.
2. ADD IN FOOD SCRAPS, FUNGI & BACTERIA
Now taking your softened paper material and add in your food scraps in a bucket along with a little bit of fungi and beneficial bacteria.
3. MIX IN YOUR CARBON, WORMS & OTHER MECHANICAL CREATURES
Take everything from step 2 and put it in a big pile of dried leaves as a carbon source. Then mix in earthworms, copepods (like woodlice), isopods (which are like little shrimp), and several other creatures native to your area.
4. BE PATIENT
Allow everything together to have a party to break everything down and turn that into a cubic yard of living soil.
This is how you grow the best food in the world.
Not only that… you have an understanding of growing something from the bottom up. Now you truly have a connection to your food.

Pin me!
Phase 1: Worm Bin
We start off by building a small worm bin in order to boost our worm populations.
This is a simple thing that you can raise composting worms so that you can have them build their numbers up. You can actually start using some of the food scraps that you have and you can familiarize yourself with how they eat and what they do and how to take care of them.
Later on the same worms are going to be added into all of that newspaper and cardboard I was talking about earlier because that’s going to become the medium that your worms live in.
Phase 2: Observing & Collecting symbiotic creatures
Next, collect a few little critters (think native earthworms, roly poly’s, mushrooms…) from healthy ecosystems close to your home and put them in an environment that is conducive for them to breed and to proliferate. In this phase you are exploring your surroundings to discover what is natural occuring in the composting systems that Nature has created.
That’s what you want to be using in the composting systems that you create so that you can have those to use in building this cubic yard of soil.

You’re identifying, familiarizing yourself with, and collecting what we are going to call “indigenous microorganisms” (IMO’s). You’re identifying the creatures around you that help you build living soil.
You’re identifying the healthy micro ecosystems around you and identifying the creatures, fungi, and IMO’s that are apart of these healthy ecosystems. We can then collect samples of them and set them up in your own areas where they will proliferate.
Phase 3: Stepping Up Your Worm Composting
After you understand the process of how to identify these creatures and how to nurture some of them in your own area, you need to learn how to compost all of the paper and compost that is apart of your daily life that you’re used to recycling or throwing away. Some of that is going to have gone in your Phase 1 worm bin already to raise your worms, so you’re going to have an idea of that. But now you’re gonna start doing it on a larger scale, using cardboard and other paper scraps as what we call a “carbon source.”

Shipping box from a certain organic clothing company! Not only can we compost the box… we can compost the clothes that came in it once they’re thoroughly worn out.
You start off by identifying all your carbon source materials. That can be yard waste, leaves from trees that are falling. The beauty about this is a lot of the stuff that would wind up going to the dump you can now compost & use. You’re helping a larger global problem! Anything that you can redirect from going into the landfill makes a difference. We all need to be responsible for ourselves and take pressure off these resources. Ultimately you’re helping the environment and you’re helping yourself.
Once you’ve identified your carbon sources and pre-treated that by moistening it and even just throwing some different mushrooms or mycelium in with it to help that whole process… we go back to when we were talking about collecting indigenous microorganisms. That’s going to be anything from fungi to bacteria to the micro and macro of little creatures.
Next we are going to identify your nitrogen source. Your nitrogen source will basically be in most of your wet kitchen scraps. It’s green waste in a sense, meaning that they have quite a bit of nitrogen in them. Chemically that would help the heating process, but in this type of composting that we’re doing we’re not going to call it the nitrogen source, we are going to call it food! Because the worms live inside the cardboard but they still need to eat something. They can eat the cardboard, and they do eventually, but they like something next to for a varied balanced diet (and for us, more nutrient-dense soil).

So what we’re calling our kitchen scraps and what we’re calling a nitrogen source, in chemical composting would create thermophilic action which would cause it to heat up. What we’re talking about here is more cold composting – letting creatures have a smorgasbord.
How to Keep the Flies Out of Your Compost Bin
Unfortunately, if done incorrectly, the kitchen scraps can attract some less than ideal creatures to come to the party (like flies). Your system can be setup so there are no flies. This can be as simple as a 5 gallon bucket with the screw lid on it, and having some wood chips or carbon material available that you can layer in with it.
We’re gonna go back to the IMO‘s, as well as having a little handful of the environment where the IMO’s live that you can throw that in the bucket with your food scraps. This makes it so the IMO’s have already started pre-inoculating your food scraps. They start to break it down before it goes into your larger compost pile.
THE CARBON & NITROGEN DYNAMIC
In traditional composting we have 2 components playing off of each other: Carbon & Nitrogen. Carbon basically supplies the energy for growth in plants. Carbon grows carbon-based life forms! Nitrogen is used for protein and reproduction. Nitrogen is going to get your compost hot.
In standard chemical (hot) composting it’s recommended to have a 25-30:1 ratio of Carbon to Nitrogen. This ratio quickly processes raw material through the heat produced by the Nitrogen present.
Due to the friends we have helping out in our compost pile, we’re trying to limit the amount of heat produced in the composting process. Thermophilic compost piles get 100-160 degrees F which will kill our little friends real quick!
We think about it very differently…

Phase 4: Composting Pile
Now we take our worm bin to another level when we are going for a larger scale. We’re going to be able to take the worms that we’ve raised in our Phase 1 worm bins and combine them with all of your yard scraps – leaves, tree trimmings, wood chips, cut grass, whatever it is you have available to you from your yard our your local area.
Now that your earthworms, the cardboard, the newspaper, they’re all going to go together now. This is also when you add your mineral material (if you’re coastal like us, that means sand).
Think about that! Now you have a whole system – all of your creatures together are in this pile that is eventually going to be broken down into fertile living soil.

ADDING IN MINERAL MATERIAL
Once we have a large compost pile setup (we usually call this the “base pile”), why wouldn’t we just throw our mineral material right in there?
By mineral material we’re talking about sand, local rocks, food scraps, strategic plants that you grow in your garden…
Think about it, plants (like fruits and vegetables) suck minerals out of the ground that they needed to grow. Each plant is going to have different minerals in it on the micro level so you’re getting some of that mineral material from the food scraps you’re adding to your worm bin or compost pile. But now you also need rock material (local gravel, sand…) in the sense of multiple minerals together.
The real simplicity of it for you is to know that you can go right out into your yard and you can grab mineral material right out of the ground. You can grab sand from the beach. If you grab a combination of some mineral material from right in the ground and soil somewhere in your area and you also grab sand from somewhere, you can mix that with all the other things that we’ve talked about in this article. You’re mixing mineral material with your carbon source, nitrogen source, and the whole army of critters are gonna eat it all up. The little creatures you throw in there are the guys having a smorgasbord. They are the partiers!

PATIENCE, CONSISTENCY & OBSERVATION
If you’ve followed Living Earth Systems for a while, you know that our biggest motto is Patience, Consistency & Observation, and no surprise, it is a key component in the soil building process.
Once you have your composting pile going, with your food scraps, paper scraps, yard “waste,” mineral material, and critters eating and breaking it all up… you have to be patient!
You get to move on to the other projects that you’re working on (maybe learning aquaponics) and allow the process to carry itself out!
Of course consistency & observation are paired with this. You need to consistently observe what is going on with your pile — check that pests aren’t getting into it and keep it moist (but not drowning).